How to Create Your Own Token on Rootstock | Rootstock (RSK)
In this tutorial I will show you step-by-step how to create a token with less than 10 lines of code, using Truffle plus Open Zeppelin smart contracts, and deploy it to the RSK testnet.
Overview
Here is a summary of the steps to be taken to build our token:
- Initialize a project using Truffle;
- Install Open Zeppelin smart contracts in the project folder;
- Create a wallet mnemonic;
- Configure Truffle to connect to RSK testnet;
- Get some tRBTC from a faucet;
- Create smart contract of token;
- Create deploy file at Truffle;
- Deploy a smart contract on RSK Testnet using Truffle;
- Interact with the smart contract at Truffle console.
Requirements
- Node.js and NPM (Node Package Manager)
- Visual Studio Code (VSCode) or any other editor of your choice
- Truffle
Node.js and NPM
Node.js and NPM are needed, though both are usually installed at once.
NB: To check if Node.js and NPM is already installed, input the following commands in the terminal:
node --version
npm --version
Go to Node.js if you need to install it.
Visual Studio Code (VSCode)
In this tutorial, we will use VSCode to create and deploy our project. Feel free to use any other code editor of your choice.
To use VSCode download it here.
Verify if your VS code installation was successful by typing the following command into the terminal:
code -v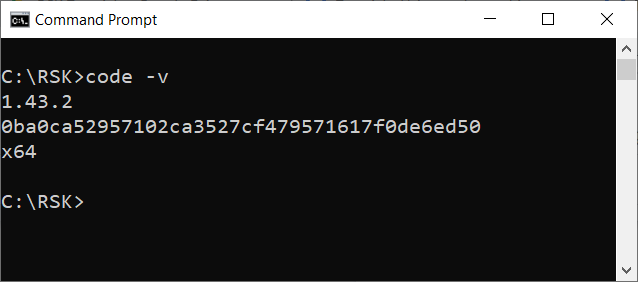
Truffle
Truffle is a popular development framework for smart contract developers with a mission to make your work a whole lot easier. Among its features, it has smart contract lifecycle management, scriptable deployment & migrations, automated contract testing and simple network management.
Truffle makes it easy to configure a connection to the RSK network.
To install Truffle, input the command below into the terminal and press enter:
npm install truffle -g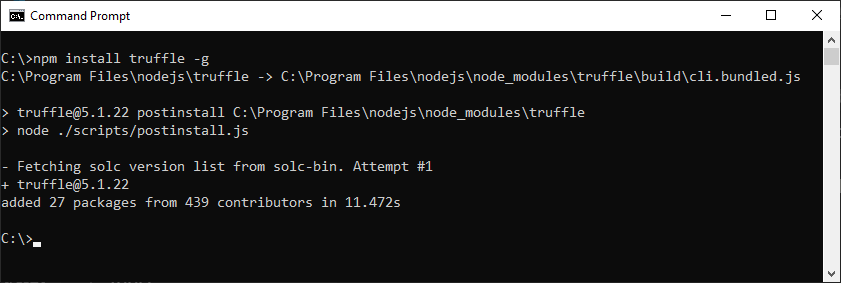
When the installation is finished, close the terminal, open it again and check the Truffle version:
truffle version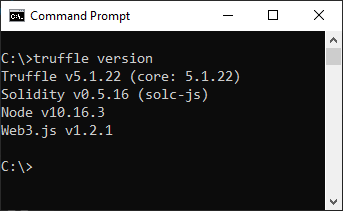
More info:
Initialize a Truffle project
Create a new folder named token:
mkdir token
cd token
Start an Truffle project in the token folder by typing the following command below into the terminal:
truffle initFor example, I will create a folder at this location - C:\RSK\ (I'm using windows OS).
My project can be located in the folder C:\RSK\token.
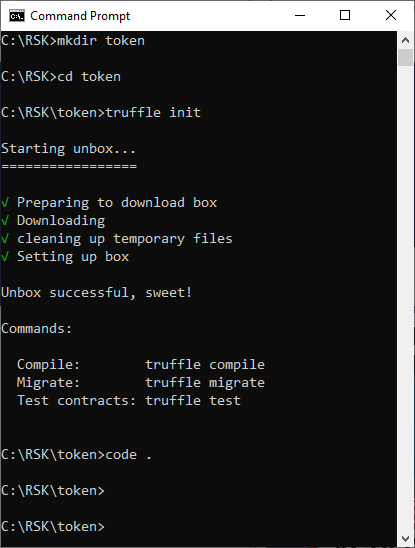
Open the folder in VSCode. Then you can see the file structure like this:
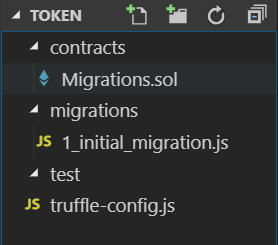
./contracts: All our smart contracts will be stored in this folder../migrations: Deployment scripts will be stored in this folder../test: Test scripts will be stored in this folder../truffle-config.js: This is Truffle’s configuration file. We’ll be able to configure networks, including RSK networks.
Note that the following files were also created:
Migrations.sol: Keeps track of which migrations were done on the current network.1_initial_migration.js: Deployment forMigrations.sol.
Initialize an npm project
Start an npm project in the token folder by typing the following command below into the terminal:
npm init -y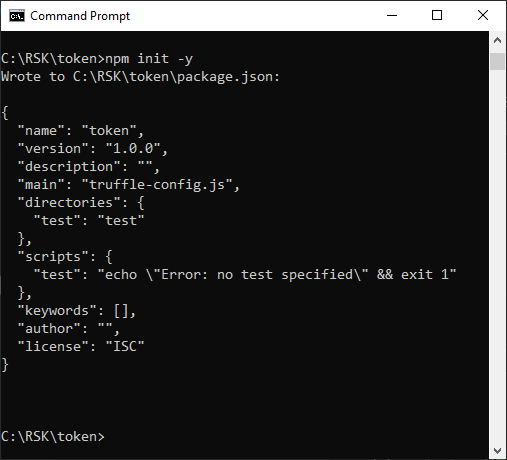
Install Open Zeppelin
OpenZeppelin Contracts is a set of smart contract libraries for Ethereum. They work well with other compatible blockchains, including RSK. These libraries will install not only the main libraries of our token but also libraries for ownership, safe math, and many other utilities. It’s worth mentioning that these libraries have been both peer reviewed and audited to accomplish high standards of security so contracts that depend on them are less susceptible to hacking when used correctly.
In the terminal, inside the folder token, install OpenZeppelin libraries with this command:
npm install -E @openzeppelin/contracts@2.5.0The option -E is to save dependencies with an exact version rather than using npm's default.
Some contracts may change over time, so it is important to set the version. This tutorial was written using the specific version gotten when we ran the
truffle versioncommand above.

More info:
Install HD wallet provider
To connect to the RSK network, we are going to use a provider that allows us to connect to any network unlocking an account locally.
We are going to use @truffle/hdwallet-provider.
It can be used to sign transactions for addresses derived from a 12 or 24 word mnemonic.
You need to have installed Node >= 7.6.
In the terminal, inside the folder token, install it with this command:
npm install -E @truffle/hdwallet-provider@1.0.34
This truffle package comes with so many dependencies. A successful installation message is shown if everything works fine.

Check package.json
package.json is a file created by npm with some configurations, including the packages which we installed before using the command npm init -y.
After the installation, I will open the project folder named Token in VSCode and verify the package.json file. Let's take a look at the dependencies in the file:

Verify that you can connect to RSK Testnet
Enter the following command into your terminal.
If you are using a Windows OS, I suggest to use the Git Bash terminal. Download the installer from the Git official site.
curl https://public-node.testnet.rsk.co/ \
  -X POST -H "Content-Type: application/json" \
  --data '{"jsonrpc":"2.0","method":"eth_blockNumber","params":[],"id":1}'
This is a command to query the network for the latest block number.
If all goes well, you'll see an output similar to the following:
{"jsonrpc":"2.0","id":1,"result":"0xc3f9b"}
The result value is presented in hexadecimal. 0xc3f9b is the block number in hexadecimal, the corresponding decimal is: 802715.
To verify the block number, visit explorer.testnet.rsk.co.

Create a mnemonic
Let's create a mnemonic in order to generate some accounts.
To learn more about it: BIP39
We are going to use this web app:
The way we are creating the mnemonic is not recommended to be used for any 'real' wallet because it's not secure generate a private key in a website, however we will use this here for learning purposes, and since we're using the Testnet anyway.
In the Generate a random mnemonic field, select 12 words and click on the generate button.

The result appears in the BIP39 Mnemonic field. They should be 12 random words like the words in the image:

My mnemonic is:
access card stove drama pizza elite argue tuition plate kiwi junior sponsorI will copy these 12 words to use it later.
File .secret
Inside the token folder, create a file named .secret.
Paste your mnemonic in this file and save it.

Configure Truffle to connect to RSK testnet
Open truffle-config.js file in your Truffle project and overwrite it with the following code:
const HDWalletProvider = require('@truffle/hdwallet-provider');

const fs = require('fs');
const mnemonic = fs.readFileSync(".secret").toString().trim();

module.exports = {
  networks: {
    testnet: {
      provider: () => new HDWalletProvider(mnemonic, 'https://public-node.testnet.rsk.co/'),
      network_id: 31,
      gasPrice: 0x387EE40,
      networkCheckTimeout: 1000000000
    }
  },
  compilers: {
    solc: {
      version: "0.5.2",
    }
  }
}
Truffle Console connect to RSK local network
You can use the Truffle console to run commands.
Verify the connection
Open a Truffle console to verify the connection.
At terminal, inside the folder token, run this command:
truffle console --network testnetAnd you go to a new console:

This action instructs Truffle to connect to an RSK public testnet node and grants it permission to control the newly created account.
To get our address
Enter the command below into the Truffle console to save the first address generated with our mnemonic into an account variable:
var account = Object.keys(web3.currentProvider.wallets)[0]The output is your account address. Enter this command to view it:
accountIn my example, the output is 0x9682725a85f85f097ab368555a286618dc982c99. Copy this address.

Check balance
To check the balance, run this command in Truffle console:
(await web3.eth.getBalance(account)).toString()The balance is 0 and we need some to pay for gas fees. We shall get some tRBTC in the next step.

Testnet Faucet
You can get some tRBTC from the RSK Testnet faucet.

Enter your wallet address that you copied in the last step, and complete the CAPTCHA.

Wait a few seconds...

You can see the transaction hash:
0x16bedc1339a8fe59e270b0c6d5175851010bb93d0cf6c4974f1705b9ead7ee6e
Now I have 0.05 tRBTC!
Recheck balance
To check balance again, run this command in the Truffle console:
(await web3.eth.getBalance(account)).toString()
Now I have 50000000000000000, which means that I have 0.05 tRBTC with 18 decimal places of precision.
Create the smart contract
In the contracts folder, create a new file named Token.sol.

Token.sol with only 7 lines!
This smart contract is a mintable ERC20 token. This means that, in addition to the standard ERC20 specification, it has a function for issuing new tokens.
To learn more about it, go to EIP 20: ERC-20 Token Standard
Copy and paste the following code:
pragma solidity 0.5.2;
import '@openzeppelin/contracts/token/ERC20/ERC20Mintable.sol';
contract Token is ERC20Mintable {
       string public name = "My RSK token";
       string public symbol = "MRT";
       uint8 public decimals = 2;
}
Let's review the above code.
To create our ERC20 Token, we will import ERC20Mintable from Open Zeppelin.
This library itself imports several other libraries such as SafeMath.sol, the standards for this kind of token, and the capability to mint tokens.
Inside the token, we define some basic information about the token: name, symbol, and number of decimals for the precision.
To inherit the library's attributes and functions, we simply define our contract as a ERC20Mintable using the is keyword in this way.

Compile a smart contract
In the Truffle console, run this command:
compile
Deploy a smart contract
First of all, we need to create a a new migrations file where Truffle will find it, containing instructions to deploy the smart contract.
Create token deployment file
The migrations folder has JavaScript files that help you deploy contracts to the network.
These files are responsible for staging your deployment tasks, and they're written under the assumption that your deployment needs will change over time.
A history of previously run migrations is recorded on-chain through a special Migrations contract. (source: truffle: running-migrations)
In the migrations folder, create the file 2_deploy_contracts.js

Copy and paste this code.
var Token = artifacts.require("Token");

module.exports = function(deployer) {
  deployer.deploy(Token);
};
Migrate
In the Truffle console, run this command:
migrateWait a few minutes while the transactions for the smart contract deployments are sent to the blockchain…
The migrate command will compile the smart contract again if necessary.

First, it deploys the smart contract Migrations.sol, file generated by Truffle:

This is the transaction:
0xd29d03fc2b904545005ab6ed205f970575aef184ebecf14c9f0f6b6f45ec1bb3
And then it deploys our smart contract Token.sol:

This is the transaction:
0xbfff7cf431bb4af9e1b059dbd6eea935d7d20e52a770c467f38b97b479ba414a
Congratulations!
My RSK Token is now published on the RSK Testnet.
Save the contract address of token, it will be used shortly:

In the tutorial example:
tokenAddress = "0x095156af46597754926874dA15DB40e10113fb4d" Interact with the token using Truffle console
We need to interact with the newly created token in Truffle console.
Get your accounts
In the Truffle console, enter:
const accounts = await web3.eth.getAccounts()To view each account:
accounts[0]
accounts[1]
Connect with your token
const token = await Token.deployed()
Confirm if our instance is OK.
Enter the instance’s name: token, then ., without space hit the TAB button twice to trigger auto-complete as seen below.
This will display the published address of the smart contract, and the transaction hash for its deployment, among other things, including all public variables and methods available.
token. [TAB] [TAB]
Check the total supply
To check if we have tokens already minted, call the totalSupply function:
(await token.totalSupply()).toString()
The returned value is 0, which is expected, since we did not perform any initial mint when we deployed the token.
Check the token balance
To check the balance of an account, call the balanceOf function. For example, to check the balance of account 0:
(await token.balanceOf(accounts[0])).toString()
The returned value is also 0, which is expected, since we did not make any initial mint when we deployed the token, and by definition no accounts can have any tokens yet.
Mint tokens
Run this command:
token.mint(accounts[0], 10000)This command sent a transaction to mint 100 tokens for account 0.

To verify the transaction in the explorer, visit:
0x2162617b34ffcd55cf719cb998e69a33cf115c5d4d58b7ee639c1060fae81355
You can mint tokens for other accounts, for example, account 1:
token.mint(accounts[1], 10000)For each account, the result will be like the following:

I can also mint to a specific address, 0xa52515946DAABe072f446Cc014a4eaA93fb9Fd79:
token.mint("0xa52515946DAABe072f446Cc014a4eaA93fb9Fd79", 10000)
The transaction:
0x1534230dea0ba07b876dd0ad22fdcb693359de42cb12e5af5e55e17543828a85
Reconfirm the token balance
Check the balance of account 0 again:
(await token.balanceOf(accounts[0])).toString()
The returned value is 10000, which is 100 with 2 decimal places of precision. This is exactly what we expected, as we issued 100 tokens
Also, you can get the balance of a specific address, for example, 0xa52515946DAABe072f446Cc014a4eaA93fb9Fd79:
(await token.balanceOf("0xa52515946DAABe072f446Cc014a4eaA93fb9Fd79")).toString()
Check the total supply (again)
Check the total supply again:
(await token.totalSupply()).toString()
The returned value is 30000, which is 300 with 2 decimal places of precision. After minting 100 tokens for 3 accounts, this is perfect!
Transfer tokens
To transfer 40 tokens from account 0 to account 2.
This can be done by calling the transfer function.
token.transfer(accounts[2], 4000, {from: accounts[0]})
Transaction:
0x529dbbe27e21770c21f4af34dbbbe23733af9be5c8c09b7dd4314fef743275a2
Account 2 had no tokens before the transfer, and now it should have 40. Let’s check the balance of account 2:
(await token.balanceOf(accounts[2])).toString()
Great! The balance of account 2 is correct.
Final considerations
Did you think that it would be so easy to use the Truffle framework connected to the RSK network, and that it would be possible to create a token with less than 10 lines of code?
I showed you how to connect Truffle to the RSK network and deploy your own token with only 7 lines of code! Also I hope that you saw how simple it is to use the Open Zeppelin libraries, and that they work on the RSK network.
Our goal is to join forces and give options to people who believe in smart contracts based on Ethereum, and also believe in the power of Bitcoin, through RSK.
I hope this tutorial has been helpful and I’d appreciate your feedback. Share it if you like it :)